 One would think with the massive hard drive sizes available, you would never run out of disk space.
But we all love our music, photos and videos of friends and families making fools out of themselves…unfortunately at the expense of taking up so much disk space on your hard drive.
While the best way for cleaning up disk space is to move your music, photos and videos to an external hard drive or USB drive, the drawback is not having them available on your Computer if you don't keep the drive always connected.
So how can you make more disk space available, without sacrificing not having good old Uncle Bud making a fool out of himself on demand?
Simply by searching for large files that have not been accessed in a long time.
With newer versions of Windows, such as Vista, 7, 8, etc…, the built in search utility has improved greatly. With a couple of mouse clicks, you can easily find large files and sort them by the last time they were accessed.
Using Windows Search
For example, say I wanted to clean up my ten gabillion sized music folder that I know I can't live with out, for files that are over 150mb, and sort by last time they were accessed.
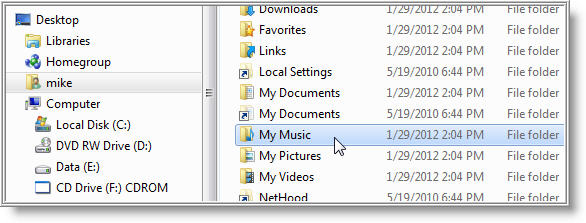
All I need to do is open Windows Explorer (mine is pinned to the taskbar) , and open the folder I want to start the search. In this example the folder is My Music.
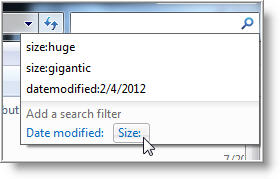
Once the folder has opened, click in the Search box located at the top upper right of Windows Explorer (with the magnifying glass).
When I do that, notice the options that are available. One of them is Size under Add a Search Filter.
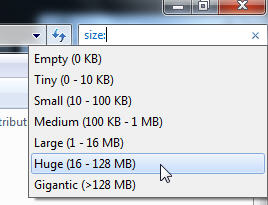
Here, I can use a pre-defined search query for different sizes. Since I'm looking for big files, selecting Huge (16 128mb) will do just fine.
NOTE: If the size you chose did not find any files in that range, you can select a smaller or larger size, by clearing the search box and selecting Size again to choose another option to search again.
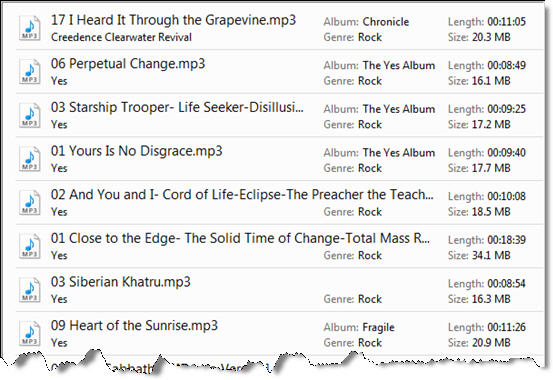
Once the search has completed, you should see a list similar to mine shown below with files that are only between 16mb and 128mb in size. Your view may be different depending on the type of files being searched (documents, videos, etc).
Sorting for Last Accessed Time
Now that you have a listing of files that match the size range selected, you will want to sort them by last time you actually used the file (or accessed it).
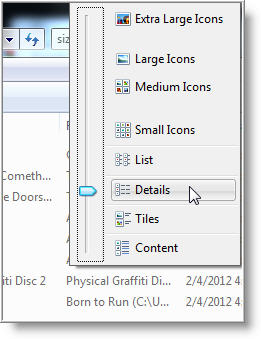
To do this, I need to change the current view - Content, which does not list specific information, such as last time they were accessed.
To show that information, just select the Change your view icon on the toolbar by clicking the drop down arrow…
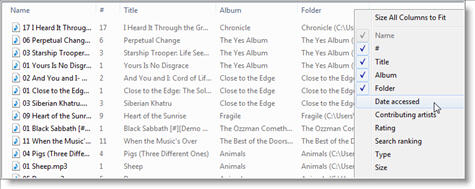
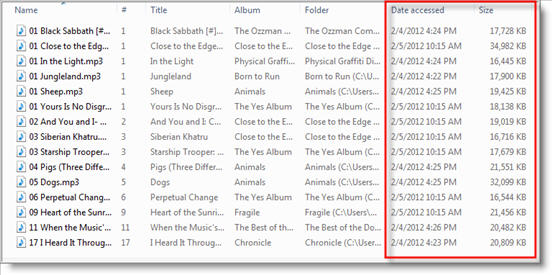
Next, right click after the last column and click on Date Accessed to add the column.
NOTE: If you don't see Date Accessed, just click on More to list all available column items and scroll down until you find Date Accessed. You can also select Size if you want to display the actual size of the file.
Now that you found all large files, you can begin the cleanup either by moving files off your computer or (gasp) deleting them…only if you really don't need them anymore.
Customizing File Size Searches
As you saw with the pre-defined search queries, selecting a specific size range makes searching for items simple and quick.
But what if you want to selected something completely different than what is available?
The solution is easy. You can customize the search by entering your own range.
For example, say you wanted to search for files between8 and 10mb. Just enter in the search box:
size:8mb - 10mb
Or find files less than 6mb:
size:<6mb
Or greater than 10mb:
size:>10mb
You can also change the date range and search for dates between different dates:
datemodified:‎11/‎1/‎2011 .. ‎11/‎12/‎2011
Or just click on the Date modified query and use the calendar.
For all the available options to use with search, check out the Microsoft official documentation for Advanced Query Syntax on MSDN.
Now that I have more disk space available, it's time to download more music and not worry about disk space.
At least for a little while 😉



Comments on Easily Find Rarely Used Large Files Taking Up Disk Space Using Windows Search
Do also use the disk clean up tool. You can easily free a lot of space by getting rid of temporary files and update backups that you don't need.