

![]() In part 1 of managing packages with Synaptic and Aptitude, we looked at how Windows users can be come familiar with using Synaptic as a GUI tool for updating, adding and removing packages. We also looked at how to select repositories to download from and setting preferences in Synaptic.
In part 1 of managing packages with Synaptic and Aptitude, we looked at how Windows users can be come familiar with using Synaptic as a GUI tool for updating, adding and removing packages. We also looked at how to select repositories to download from and setting preferences in Synaptic.
In the second part, we'll look at using the command line tool, Aptitude, for package management on your local computer or on a remote ubuntu system.
One of the benefits of using a Linux based system like Ubuntu, is the capability to do anything from the command line such as package management using the utility Aptitude. To get started, open the run dialog box by pressing Alt+F2 and type xterm.
Once the terminal window opens, enter aptitude.
Note: root privileges are not needed to the program. You will be prompted to enter your password when root access is needed while using Aptitude.
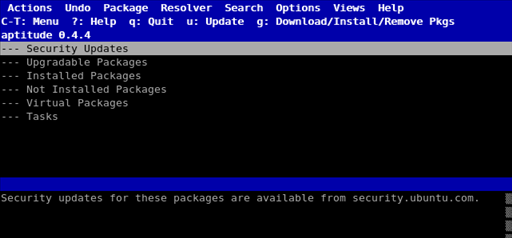
The first thing you will notice is that the screen is split into three main sections:
- a menu at the top of the display, which can be accessed using the mouse and clicking on the menus or pressing Ctrl+t and using the arrow keys to navigate.
- in the middle, below the menu is the package listing listed in groups.
- at the bottom is the message area where package description and status information is displayed.
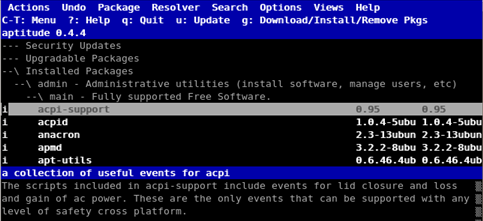
Selecting a group in the package listing section by pressing the ENTER key, will list all the subgroups. To navigate down through the subgroups, continue to press ENTER and so on. Selecting an expanded subgroup and pressing ENTER, will close the group.
Update The Package List
First task that should be done, is to make sure the package list is updated, by selecting from the menu Actions \ Update package list. You will see a lot of screen activity followed by the cache being loaded, then you will be returned to the main screen.
Upgrading Packages
To view what packages are available for upgrading, select Upgradable Packages and start expanded all subgroups. To select a package for upgrade, press Shift+ (plus key) to mark it (the package will be marked with a "u") You will also notice to the right (circled) the size of the package and the version numbers.

TIP: to view available shortcut keys, select any option from the menu and look to the right of the command for the shortcut.
To deselect the package, select Undo from the menu or press Ctrl+u. When you are finished selecting packages, press G to install. Since you did not start Aptitude with root privileges, you will be asked to enter you password before the upgrade can continue.
Managing Packages
Installing and removing packages are performed in the same way as upgrading. navigate through the list of package groups and highlight any package. To install, press Shift+ to install (package will be marked with an "i"). To remove any packages press Shift- And to prevent a package from being automatically upgraded (known as holding the package), press Ctrl=
Using Search
You can use the search function to find packages by name. To search, press / and the search dialog box will appear. Enter any search term or package name and the results will be displayed immediately.
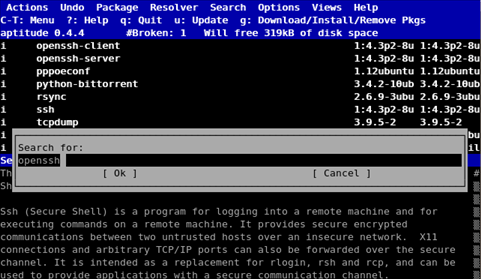
To search backwards through the package list, press / and enter you search term. Once you are finished searching, you can close the search window by clicking on cancel.
Aptitude comes with an excellent Help function and User Manual if needed. When finished, press Q to quit the program.
While there are many more features available with Aptitude, the purpose of this guide is to get Windows users familiar with managing packages from the command line. As you continue to use Ubuntu, you will become more comfortable and gain more experience to perform more complex tasks as creating packages from source and other administrative tasks.
Leave a Comment