

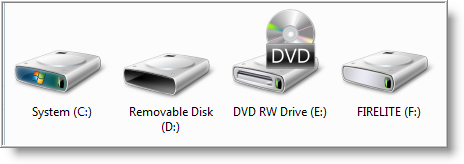
 It's a known fact, it's much easier to remember or identify things quickly, if they are displayed with colors or images such as icons and pictures. With Computers this is no exception. Take a look at the icons used for displaying hard drives and USB drives.
Unfortunately, those icons all look similar to each other, especially for USB drives.
Well, you can easily change the icon for your USB drives so they stand out from the crowd and make it easier to identify. Here's how…
First you need to find a cool graphic that will be used to display the new icon of your USB drive. The graphic can either be an .ico or .bmp file. (you can download cool icons from http://www.iconarchive.com/).
Once you have the new icon, create a text file on your Desktop (right click and select New \ Text Document) and name it:
NOTE: If the file autorun.inf exists on your USB drive, you do not need to create a new file.
autorun.inf
Next, open the file using notepad and copy the following text to the file (remember, if the file already exists, check to see if the following text is present),
[autorun]
icon=favicon.ico
The file name for the icon parameter should be the name of your .ico or bmp file. For example, my autorun.inf file has the following:
icon=wtn.ico
If you also want to change the name of the USB drive that is displayed, add the following text:
label=NewNameofDrive
Don't forget to change NewNameofDrive to what ever name you want the USB drive to be identified as.
Now copy both files (autorun.inf and .ico or .bmp) to the root of the USB drive. To view the new icons, safely remove the USB drive then plug it back in.
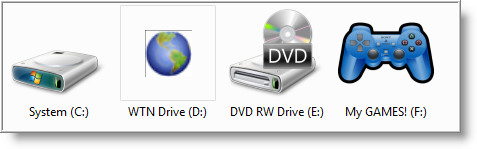
Now you can easily and quickly identify your USB drives…with out needing to remember their names!
Comments on How To Change The Icon Displayed For USB Drives.
Thx mate. This is great!
Just what I wanted.
Not working!!
Thank you verymuch.. it works perfect… Sharing the knowledge is great thing…. thanks again..
Can't get it to work, even when I looked up other instructions, PLEASE HELP!!!
Hi,
Im also not able to get the correct result.
please help
Zomg!!!!!!!!!!!!!!!!!!!!!!!!!!!!!!!!!!!!!!!!!!!!!!!!!!!!!!!!!!!!!!
Yeah…it worked for the name but not for the icon…actually my icon disappeared, that's wgy I was trying to replace it
Bravo!!!!!
I was looking this thing.
Nice!!!!!
Thanks!
Bye!
Cool:)
Thanks a lot for teaching that
i was really looking for this for a long time ago
once again
thanks a million !!!!!!!!!
Thank you very much. Result is correct.
for evrybody that has problems, after you make the changes in the autorun file you need to save it under autorun.inf AND make sure it is saved as " all files" and not "text documents"
Hi, Is there a way to make it from :BAT or .CMD file instead of Autorun.inf? Thanx…
If anyone reads this, please reply. I tried this but when I went to save it said it alread existed so I pressed replace and it came up with "access denied". I then tried to delete the file and it said "access denied". Help?
Hi,
Thanks for your help. Where do you save the icon to, that you want to be displayed as the icon for a usb drive? Do you save it to pictures on the actual drive?
hey dude if the i already used the autorun.inf , what shall i do to change my icon?…
I recently had to Reinstall Win 10 [turns out MS downloads are causing problems].Anyway, the icon for one of my Flash Drives won't respond to autorun.inf, although it's OK on my other pc.